Showing posts with label DIY. Show all posts

Friday, April 29, 2022

Installing Washer & Dryer Hookups In The Shed

 I've been waiting and waiting...
And waiting some more.
The life of being an electrician's wife is that I get to see him fix everyone else's stuff while my list of electrical stuff, that I want done, gets to wait until Bob feels like doing it. And, I get it. He gets a payoff to do other people's stuff.
The payoff for doing this is saved gas and money having to run into town to the laundromat every 7-10 days. We don't have to worry if someone used something that is going to making my ridiculously sensitive skin flare up in a rash. I can wash our bedding a bit more often than what we do because it truly is a pain to strip the bed down with these cats and dogs...well, dog. Sasha can't jump up onto the bed anymore because she's going to be 15 years old in December.
I want to be able to stock on laundry soap. I won't be making my own as that's the quickest way to ruin an HE washer and, going off the opinion of my husband who does appliance repair (he's not just an electrician), the homemade is NOT the way to go.
I told Bob that the main thing is to get the washer hooked up. We're opting to not install a water heater at this time. I have a small one. It's like 2.5 gallons. I just don't feel it's necessary. I can wash everything just fine in cold water. If Bob wants to wait a bit before hooking up the dryer, I'm okay with that, too. I have a clothesline and I just ordered 100 clothespins. I like to hang my stuff out anyhow. I like how it smells.

I'm going to attempt to give my explanation as to how this all got installed and I'll be asking Bob for clarification.

We started yesterday at the Home Depot.


Bob's like a kid in a candy store at that place!


Just a note here. Electrical parts and supplies are not cheap. Wire is freaking expensive! The cost of electrical wire fluctuates daily, too. For a 250-foot roll of #12-2 copper wire, it's $268. One year ago, that same wire was $109.


This is the sub-panel. Bob installed it first. This is actually called a sub-main because our main is out on our power pole. This has a quad breaker, 2 pole 30 and 2 single pole 20 amp breakers that Bob installed. These are for the dryer, the washer and a general receptacle for whatever we may need it for. This feeds the metal shed where the washer and dryer will be.


I helped Bob do some wire pulls. That was interesting and, honestly, it made my arm sore. I couldn't imagine pulling wire for hours on end. This has a 30-amp, 240 circuit and 2 20-amp circuits in this pull. I fed it and Bob pulled it.


These are the conduit runs that Bob installed. One is in 1-inch conduit and it's underground and the other is 3/4-inch flex run on top of the ground and attached to the shed. If you didn't know that he did that conduit run, you'd never know it was there underground. The conduit run only took Bob about an hour. He's got some SKILLZ!


This is when Bob was getting ready to mount the junction box on the side of the shed, that will feed the wire run into the shed.  He's got a couple of really super cute helpers, too. Rose is the chocolate one and Sasha is the black one. They are both purebred Australian kelpie dogs.


Rose is supervising Bob, who is mounting a junction box onto the side of the shed.


Here is the junction box finished.


This is the inside part of that junction box that Bob mounted on the outside of the shed. Don't pay any attention to this washer and dryer set. They are being sold. I actually have 2 sets at the moment. Don't ask! We're installing front loaders. So, if anyone needs a set, and you're local, let me know. I'll sell 'em cheap!


Here is Bob mounting the 30-amp dryer receptacle.


This is where Bob made up the washer receptacle.
The wires coming out are going to be for the extra receptacle he's going to install in there...in case I want a light or a heater or whatever. It'll be a dedicated 20-amp circuit.


This is the finished electrical install. We still have to get the water there. That won't be too hard. We're going to draining into a daylight ditch to water fruit bushes with. Since we're on a well, every bit of water conservation we can do, we will. So, within a few days, I'll be up and running and being able to wash laundry at home. It's been a long time!

Thanks, Bob!

Saturday, April 23, 2022

Instant Gravy Mixes From Scratch


  I bought a lot of ingredients the other day. There's a reason why I did this. Bob and I tend to use a lot of instant gravy packages. Instant gravy packages tend to have a large amount of salt in them. I'm trying to cut down on salt per my doctor.
I ran across a YouTube video the other day and I thought that what this lady did was such a great idea that I wanted to make my own. Click here to view the video. She did a lot of other instant sauce mixes and I will make some, but I wanted to make these 3 instant gravies first.
On a side note, the cost of powdered milk is ridiculous! That bag, that doesn't even weigh 2 pounds, was almost $8.50! That's frigging expensive! The good thing is that I only used 1 cup of it on these recipes.

Some of these items were a stock up. I can't believe I didn't have poultry seasoning, but I haven't bought it in many, many years. I grow everything that's in poultry seasoning and I'm able to grow it and harvest it year round. So, now I have a small bottle of poultry seasoning. I'll have to think of things to use it in. If you have an idea, let me know in the comments below.

I am not stressing on the fact that 2 of these recipes have 1/2 cup of bouillon in each one. I only use 2 or 3 tablespoons per batch of gravy anyhow.


Everything gets whisked up in a big bowl and put into quart canning jars.


Whisk! Whisk! Whisk!


This is an amount that will take us well through next fall and into next winter before I will need to make more. I'm very happy with that. The bonus is that I don't have to corral and contain a gazillion little packets in my cabinet. I'm trying to get away from doing that. Less garbage to haul off. I like that.


On the lid, I wrote the directions. I didn't mind doing this because these 3 jars are now dedicated to holding gravy mixes.


Into the jars. This is my production line.


These 3 mixes will handle any situation where a gravy is called for.

Can I make gravy from scratch? Yes, I certainly can and I do on different occasions. I make really good gravy! An ordinary dinner is just not one of those occasions for us...especially since we're both tired from diving into spring cleaning and Operation Organize the RV Kitchen.


We are just too worn out for anything other than a homemade instant gravy.

Country Gravy
*makes approximately one quart of instant dry gravy mix

2 cups flour
1 cup powdered milk
1/4 cup cornstarch
1/2 tablespoon freshly ground black pepper (yes, 1/2 of a tablespoon! You read that right!)
2-1/2 teaspoons salt
2 teaspoons onion powder
1 teaspoon poultry seasoning

Mix everything together and store in an airtight container for up to 6 months. I don't know why they said 6 months because this stuff will totally last for a year or better if it's in a sealed jar.

Chicken Gravy
*makes approximately one quart of instant dry gravy mix

2 cups flour
1/4 cup cornstarch
1/2 cup chicken bouillon powder
2 tablespoons onion powder
1 teaspoon garlic powder
1 teaspoon poultry seasoning
1/2 teaspoon ground dried thyme
2 teaspoons dried parsley flakes
1/2 teaspoon freshly cracked black pepper

Mix everything together and store in an airtight container for up to 6 months.

Brown/Beef Gravy
*makes approximately one quart of instant dry gravy mix

2 cups flour
1/4 cup cornstarch
1/2 cup beef bouillon powder
2 tablespoons onion powder
1 teaspoon garlic powder
1 teaspoon paprika
1-1/2 teaspoons dried marjoram
1/2 teaspoon freshly cracked black pepper
1 teaspoon dried parsley

The following recipe directions are for all 3 gravy mixes.

To use: melt 2 tablespoons of fat in a saucepan. I used butter but you can use oil, lard, chicken fat, bacon grease...whatever you'd like. Add 2 tablespoons of instant gravy mix and cook, stirring for 2 minutes to take the raw taste out of the flour. You're making a roux. Pour in 1 cup of milk, water or broth. Make sure your liquid is cold. Whisk and cook until mixture boils and the gravy gets thick.

NOTE: Do you notice how these 3 recipes all start off with 2 cups of flour and 1/4 cup of cornstarch? That's handy.

NOTE: With the brown/beef gravy, when you make it, it will not be very brown. You can add 1/2 teaspoon of a browning sauce, like Kitchen Bouquet when cooking.

NOTE: With the chicken gravy, once gravy comes to a boil and is thickened, you can add 1/4 cup heavy cream to make a delicious sauce for a Chicken Pot Pie.


So, I hope you find these recipes useful because you never know when you might be in a situation where you need to get a meal put together quickly. This fits that ticket quite nicely.

Friday, June 11, 2021

Asian Chili Oil...As Promised

I promised everyone on Facebook that if they would help me get this blog up to 20 followers, I'd cut loose with my chili garlic oil recipe. This recipe is something that I keep in my fridge at all times because I drizzle it on everything. I do not buy chili oil from the store. Making my own tastes so much better. I start out by toasting some sesame seeds over low heat until they start to turn brown and get a nutty flavor. As a matter of fact, since it's raining out, today would be a good day to simply toast up a batch of sesame seeds to just have on hand.
Here are the aromatics that will get infused into the oil. It is not simply chilis, oil and garlic. Nope. There's much more flavor in there. Let's talk about some of these aromatics.
First, there are Szechuan peppercorns. What these do is give your tongue a numbing sensation. I use them quite often when cooking spicy Asian dishes and they are something that I always have on hand.
I also use green cardamom pods. These are optional, as are the whole cloves. You don't have to add them, but since I have them on hand, why not? The rest of the must have aromatics are star anise, a stick of cinnamon and a couple of bay leaves.
This was the ingredient that I was waiting on. I order it from Amazon because there are no supermarkets, in my area, that carry gochugaru. Gochugaru is Korean red pepper flakes. These are delicious.
You use any neutral flavored oil. I chose to use avocado oil.
The aromatics, along with a couple of scallions and a couple cloves of smashed garlic get infused into the oil, over super low heat for as long as it takes for the onion and garlic to get quite brown. It can take up to an hour.
After that, you pour the oil through a strainer to strain out all of the aromatics leaving you with just the flavored oil.
Pour the oil very slowly over the gochugaru in a heat proof container (I use a stainless bowl) as it will bubble up. After that, stir in the toasted sesame seeds and sea salt to taste.
Store in the refrigerator. This oil will last up to 6 months when properly stored.

Asian Chili Oil

1-1/2 cups avocado oil (or any other neutral flavored oil, like canola or vegetable)
4 whole star anise
1 cinnamon stick
2 bay leaves
1 tablespoon Szechuan peppercorns
5 green cardamom pods
1/2 teaspoon whole cloves
2 scallions, white parts only
2 cloves garlic, smashed
3/4 cup gochugaru
1 tablespoon toasted sesame seeds
1/2 teaspoon French grey salt (or whatever salt you like)

Combine the first 9 ingredients in a heavy bottomed saucepan and cook, over very low heat, until the garlic and scallions are quite brown and fragrant.
In the meantime, add the gochugaru into a heat proof bowl. Measure out the salt and sesame seeds into a small bowl and set aside.
Once the oil has been fully infused and is very fragrant, pour S-L-O-W-L-Y through a fine mesh strainer over the top of the gochugaru. This will bubble up very vigorously. Once you've poured all of the oil in, add in the sesame seeds and salt. Stir well (I use a chopstick for this). Cool to room temperature, pour into a container with a tight-fitting lid and store in the refrigerator for up to 6 months. Use whenever you need a kick of chili flavor.
 

Tuesday, June 8, 2021

Homemade Fruit Vinegar

I was super bored a while back and I ran across a YouTube video of a guy who made his own vinegars. This was intriguing to me. I decided to give it whirl. I used dried fruit: mango, blueberries and regular ol' raisins.
You want to fill a very clean quart jar 1/4 of the way with dried fruit and top it off with bottled water (you want it to be purified). Top each jar with a coffee filter and secure with a rubber band. It will take a few weeks to see anything happening. This is where you are trying to capture some wild yeast.
Every single day, you want to stir your fruit. After about 2 weeks, it will start to turn into alcohol and you'll be able to smell it.
It will be foamy when you stir it. If you forget to stir, it can get a bit of mold on it. Just remove that with a spoon and carry one as normal.
Here are the raisin photos. It's the same process with any dried fruit.
The raisin one took a few more days to ferment than the mango one did. I still haven't gotten the blueberries to go. I'm going to just let them hang out and see what happens to them.
Yesterday, I strained the fruit out and discarded it. It did its job wonderfully. When I tasted the liquid, it tasted like vinegar. I put it into a clean jar and capped it. Vinegar ages well, just as wine does.
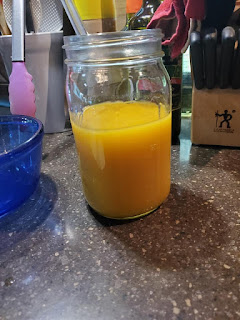
Finished mango vinegar. I'll use this in some Caribbean-inspired BBQ sauce.
Next, I strained out the raisins. I tasted this vinegar. This was surprisingly delicious. I'll be using this in place of rice wine vinegar in Asian recipes.
I have 2 new vinegars to experiment with now. Next on my list is some papaya and some currant vinegar. What will I do with those? I do not know, but the sky is the limit!