Showing posts with label from scratch. Show all posts

Sunday, August 6, 2023

Fresh Blackberry Cobbler Baked On The Grill

 Is there anything better than a freshly picked, ripe blackberry? Maybe...but not many things can rival the flavor. Blackberries have always been a particular favorite of mine. I'd even get out there and pick them if I weren't dragging around an oxygen tank and I wasn't terrified of snakes. We do have snakes here and where they hang I out, I don't. I don't even care if they aren't venomous and all that. I. Don't. Do. Snakes. At. All.


We had some friends come up who wanted to pick. They used to be neighbors of ours in the old RV park that we lived in. She had a place to pick but I guess they either told her that she couldn't access the property any longer or they sprayed the area. I don't really know. I just know that ours are spray-free and all organic and we have plenty.


Even Rose, our Australian kelpie dog, hung out with us. This was down in our lower field along the fence line by our second gate.


So, now onto my utterly delicious and easy cobbler recipe.


First, go pick a few pints of blackberries.


They grow all over the place around here. They can actually get quite invasive.


Spray an 8x8-inch baking pan with non-stick cooking spray. Add in 2 pints of fresh blackberries.


Mix up the cobbler batter. This comes together in a snap.


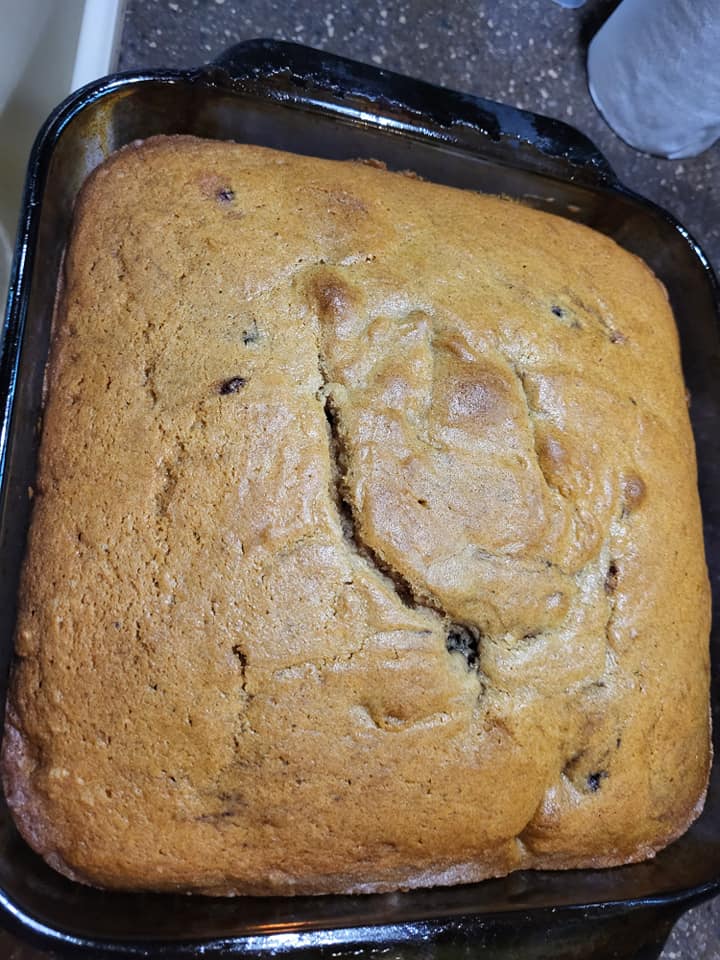
Pour the batter over the berries. Sprinkle a few tablespoons of sugar over the top and put it on a metal baking sheet and put it out on a gas grill, indirect heat, holding at around 350 degrees for about 20-25 minutes. If it starts to brown too much on one side, spin it around. When a toothpick inserted in the middle pulls out clean, the cobbler is done.


Laurrie's Fresh Blackberry Cobbler Baked On The Grill

1/2 cup unsalted butter, melted
1 cup all-purpose flour
1-1/2 teaspoons baking powder
1/4 teaspoon sea salt
1 cup milk
1 cup + 2 tablespoons sugar
2 teaspoons vanilla
2 pints fresh blackberries

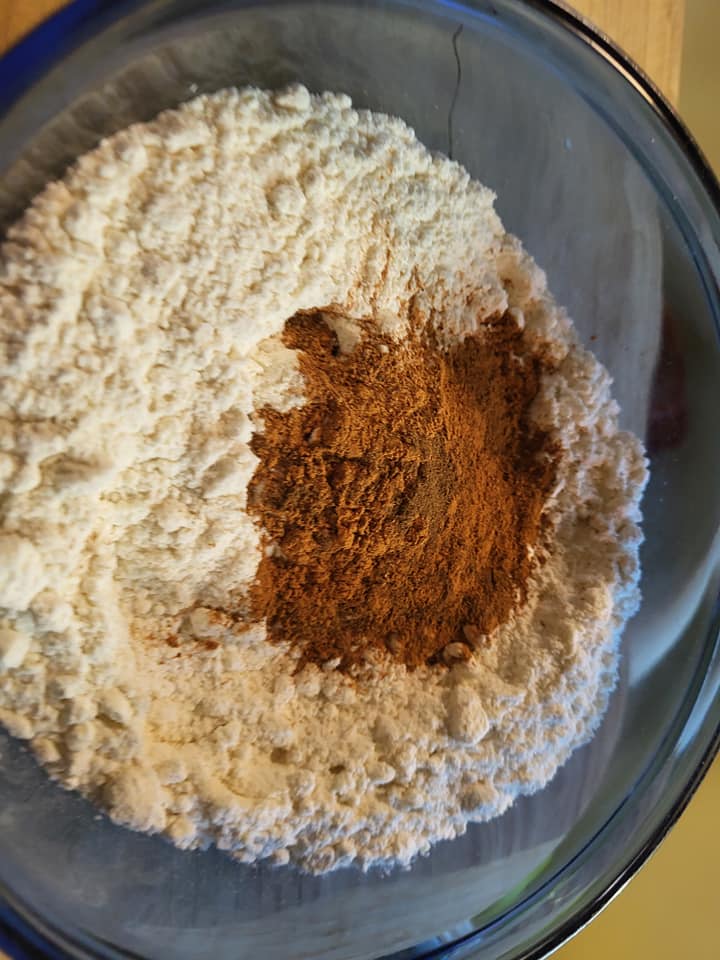
Spray an 8x8-inch baking pan with non-stick cooking spray. Spread 2 pints of fresh blackberries in the bottom. Mix together flour, baking powder, salt and sugar. Mix in milk until most of the lumps are removed. Beat in the melted butter until batter is really smooth. Add vanilla and beat until combined.
Pour over the berries evenly. Put baking dish onto a metal sheet pan and put on a grill, upper rack preferably, over indirect heat. Start checking to see if it is done after 20-25 minutes using the toothpick test.
Serve alone or with either whipped cream or vanilla ice cream.


We plan on putting several gallons into the freezers for our birds this winter. They will enjoy the treats and we will, too. You are also able to use frozen berries to make this cobbler, as well. You can switch up the berries to include your favorites, like blueberries or even cherries.


Fresh blackberries are truly one of the treasures of summer! Enjoy!

Sunday, May 21, 2023

Chive Blossom Vinegar

 If you grow your own chives, you'll know that they produce a pretty lavender colored flower. From those flowers, we get seeds. I've been growing the same pot of chives, that I started from seed, for close to 10 years now.
What can you do with chives other than snip them onto a baked potato? Well, there's a lot you can do with them. I like to dehydrate them and powder them up and use them in seasoning blends. I also love to pick the flowers and make vinegar with them. They make an amazing base to vinaigrette dressings.

First, I'll show you all yesterday morning's livestock sighting down in the rock pit.


They like to graze down there. We like to watch them grazing down there. We see deer here almost every day. There were 4 does, but I couldn't over to get the other 2 in a photo.


I asked Bob if he would go out and pick the flowers off of the chives so that I could make vinegar. He agreed.


I did have to tell him to not pull the chives out by the roots.


He used his pocketknife. That was completely fine with me.


He came in with a fairly decent amount. They will continue to flower, so I'm not worried about not leaving enough blooms to reseed. There will be plenty for that and to make more vinegar.

I divided the blooms between 2 half-pint jars. I also snipped in some fresh chives.


I topped off the jars with white wine vinegar.


After that, just put the lids on, put in a dark, cool place for 3 or 4 days and then strain the vinegar. I plan on putting it back into the white vinegar bottle.

Now, I am waiting for my garlic scapes to come on. I hope it's soon!
Enjoy!

Thursday, April 6, 2023

Miso Glazed Salmon Filet

 I got some news last week. My back is in shambles. I have a protruding disc and I have degenerative disc disease. I also am in need of both hips being replaced because of osteonecrosis. So, not only am I trying to bounce back from that toxic mattress, I have to deal with these other issues, as well.
It was suggested that I make an appointment with a health coach and talk to them about gastric bypass. I'm really not interested in that. I'm not saying that it won't happen, but I'd like to try to take the weight off myself, first.
I started by eating salads with a couple of boiled eggs on them for dinner for the past 2 or 3 nights. It got old rather quickly. I opted to go with a lean protein, salmon, for tonight.

First, though, I needed to make a side dish to go with the salmon. This is a recipe from Maangchi called Signumchi Namul. Click on the name to view the recipe. It's a super simple spinach recipe that takes, literally, just a few minutes to prepare.


It's a delicious addition to any Asian meal.

Now, onto the Miso Glazed Salmon.

Miso Glazed Salmon
makes 1 serving

1 4-oz. salmon filet
2 teaspoons white miso paste
1 teaspoon low-sodium soy sauce
1/2 teaspoon coconut palm sugar
1-1/2 teaspoons rice wine vinegar
1/2 teaspoon sesame oil
Chopped scallion and toasted sesame seeds for garnish

In a small bowl, combine miso paste, soy sauce, sugar, vinegar and sesame oil to make marinade. Whisk to combine. Reserve 1 teaspoon of marinade.
In a small bowl, add salmon filet. Pour over marinade. Cover and refrigerate 1-3 hours.
Preheat oven to 375 degrees. Lightly oil a cast iron skillet with avocado oil. Put salmon in skillet, skin side down, discard marinade. Bake 12-14 minutes or until not quite done. Pour reserved marinade over the salmon, put under broiler and broil for 1-2 minutes.
Garnish with chopped green onions and toasted sesame seeds.


Enjoy!

Wednesday, February 22, 2023

Creamy Chicken Orzo

 It's been snowing off and on all day today. We wanted some serious carby comfort food. Bob took out a chicken breast for dinner. Normally, I'd cut it up and marinate it in yogurt and make some Indian inspired dish with a side of rice, but I didn't want that today. I wanted pure comfort food. I found this recipe online and used it for inspiration. Click here to view. I reworked the recipe.


This recipe starts out with me poaching the chicken breast in some chardonnay, water, salt, peppercorns and 4 cloves of garlic that I put through my garlic press. I let it cook and I diced it up.


Then I diced up celery, onion and carrots.


I minced up a few cloves of garlic. I didn't put these through the press because I didn't want that heavy of a garlic flavor.


Gather the rest of your ingredients.


Saute the vegetables in some olive oil in a pot with a heavy bottom. I use my enameled cast iron Dutch oven.


Cook for about 5-7 minutes and then add the garlic, broth and orzo pasta.


Stir to combine. Bring to a boil, reduce heat to simmer for about 20 minutes or until the liquid is mostly absorbed by the pasta.


Just as it is finishing up, add in 1/4 cup of heavy cream and mix it in.


Creamy Chicken Orzo
4 servings
1 tablespoon
extra-virgin olive oil
1/2
medium yellow onion, chopped
3
ribs celery, chopped
2 carrots, peeled and chopped
2
garlic cloves, minced
4 cups
chicken stock
1-2 cups
shredded cooked chicken
1/2 pound
orzo
1 teaspoon dried parsley

Salt & pepper, to taste
1/2 teaspoon dried thyme
1/4 cup heavy cream

Heat the olive oil in a large pot. Add the onion, celery, and carrots and cook until the onion is translucent, about 7 minutes. Add garlic and cook about 1 minute longer
Add the chicken stock, increase the heat to high, and bring to a boil.
Once the stock is boiling, stir in the chicken and orzo. Reduce the heat to medium and add the parsley, salt, thyme, and pepper.
Simmer until the veggies are tender, the orzo is creamy and amost of the liquid has been absorbed, about 20 minutes. Add heavy cream and mix to combine.


Friday, February 17, 2023

Hawaiian Loco Moco

 I hadn't heard of Hawaiian Loco Moco until recently. I'm not sure why that is and I'm not sure why I waited over 50 years to taste it, but this recipe will be going into our regular rotation. There are 4 components: the base of steamed rice, the burger patty, the gravy and the sunny side egg that goes on the top. It's delicious! It's economical. It's very filling and, the best part is that you only need 1/2 pound of ground beef for 2 servings.

I did serve this with Hawaiian Mac Salad.


 Very quickly, the the ingredients for this salad are:
Salad macaroni
Grated carrot
Minced onion
Finely diced red bell pepper
Cubed cheddar cheese

The dressing is:
Mayonnaise
Milk
Apple Cider Vinegar
Sugar
Salt & pepper, to taste

It's very simple. I can't give you measurements because I don't measure.

Now, back to the scheduled program of Loco Moco.


This is absolutely delicious! You have to put a crispy edged sunny side up egg on the top. The yolk mixes with the gravy on the ground beef patty and makes this delectable, silky sauce.


Hawaiian Loco Moco
2 servings

Prepare 1 cup of rice. You can use jasmine, basmati or just regular white rice. It's up to you. Rice is cooked using a 2:1 ratio. That means for every 1 cup of rice, use 2 cups of water. You don't even need a measuring cup. You can use whatever vessel you have on hand. Just use 2 water to every 1 rice. Rice cooks, covered for 20 minutes.

1/2 pound 93% lean ground beef
2 or 3 dashes of Worcestershire sauce
1/4 teaspoon seasoned salt
Freshly ground black pepper, to taste
1/2 teaspoon garlic powder


Mix together in a bowl and form into 2 patties. Cook in a heavy bottomed skillet (we used cast iron) until desired internal temperature is reached. I prefer my burgers to have no pink. Remove from the skillet, tent with foil to keep warm, and set aside.
In the meantime, make the gravy.

For the gravy:

1 tablespoon butter
1/2 medium onion, diced
1-2 mushrooms, sliced (I diced mine as my husband has difficulties eating some food unless it's finely diced)
3/4 cup beef broth
2 teaspoons shoyu soy sauce (use regular if you don't have shoyu, it's perfectly fine)
1/2 teaspoon Worcestershire sauce
1 teaspoon ketchup
2-1/2 teaspoons cornstarch mixed with a bit of water to make a slurry

Cook the onions and mushrooms, in the butter,  in the same skillet that you cooked the burgers in, making sure to scrape up the browned bits off the bottom of the pan. Once everything is cooked down, about 5 minutes or so over medium heat, add the rest of the ingredients except the cornstarch. Bring to a boil, reduce heat, simmer 3-5 minutes. Add the cornstarch slurry, bring back to a boil, whisking continually, until thickened. Remove from heat, cover and let set for a few minutes while you make 2 sunny side up eggs.

You will also want to slice up a green onion to use as garnish.

On a plate, add a mound of steamed rice, top with a burger patty, top that with gravy, top all with a sunny side up egg and garnish with green onions.

Enjoy!


Tuesday, November 22, 2022

The Start of Thanksgiving Cooking 2022

 I'll admit that I use broth in a box throughout the year. It's not that I can't make my own stock. I absolutely can. It's just that usually I have no room in my fridge or freezer to horde chicken or turkey carcasses.
That changed. Our old little chest freezer gave up the ghost on us. We didn't realize it, and we lost a full freezer full of food. We bought a new chest freezer, however. I stocked up on several turkeys and turkey breasts. We don't eat turkey nearly enough throughout the year. I made us a turkey dinner, using one of the frozen turkey breasts that I had squirreled away, just because, not long after we moved up here to Kelpie Kapers Farm. I found whole turkeys for 98 cents per pound at Walmart. I bought 3 of them. Likewise, I found turkey breasts at Safeway for $12 or less. I bought 2. I purposefully kept room in that chest freezer to store my bones so that I can start making my own stock. My goal is to become less dependent on the supermarket supply chain and slowly work over to using my own home produced items. I will start with growing amaranth and quinoa next year.
I'm getting ahead of myself. I tend to get a bit excited when I talk about my self-sufficiency goals.

Back to making stock. The key component to any successful and delicious Thanksgiving feast is a good homemade turkey stock. Safeway had turkey necks for sale. I bought a pack of 3 of them. They were a bit on the spendy side, at over $3, for a piece of turkey that nobody really ever thinks of...but I sure do! Not only do turkey necks make a delicious stock to use for dressing and/or gravy, the meat off of the necks is some of the most delectable meat on the whole bird! It's just a major pain in the keister to pick it off the bones. That's why I only do it when I want to make a dinner that I want to impress Bob with.

I decided a few weeks ago to start collecting vegetable scraps to make my turkey stock with. They hung out in the freezer for a bit.


I bought my vegetables for Thanksgiving with the idea of most of them being multipurpose. I'm adding chopped fennel to my dressing this year. I bought a fennel bulb with a lot of fronds and stalks on it so that I could use it in my stock. Not only that, but I saved my asparagus ends for the stock. A word to the wise and because my sister, Ginger, gave me a heads-up about putting asparagus ends into stock. Too many of them will cause your stock to have a bitter taste to it. Use them sparingly. I'll still save them because I like to use them to make cream of asparagus soup. That's a different blog post for another time, though. 


I added in a shallot that I simply cut in half. I didn't bother peeling it. There's no need. The solids are all strained out and discarded (except for the turkey necks). I added in 3 or 4 bay leaves, celery, carrots, a whole head of garlic that I cut in half. I left the skin on the head of garlic. It's like the shallot. There's no need to peel it. I also added in a couple of parsnips that had seen better days that I had in the crisper drawer.  I also added in some Penzey's Bavarian Herb blend. It has all the good stuff in it. Some kosher salt and freshly ground black pepper finished it all off.


I love that we have well water up here and we don't have to use city water. I added in 2 quarts of cold water and a good glug of a nice oaky chardonnay.
I put this over high heat just until it came to a boil and then I turned the heat down to low and let it simmer. It reduced by over a third. I added another half quart of water to it and let it condense down again.
When all was said and done, it took around 2-1/2 hours to get a quart of some rich looking turkey stock to use in my stuffing and gravy recipes on Thursday.


Cheers!

Thursday, September 15, 2022

Blackberries

 We are running roughly a month late here in western Washington state, but blackberry season is now upon us. Bob has been picking them for me and I've been experimenting with recipes. It's cool to have so many blackberries around here that I can experiment a bit.

Blackberries are an invasive species here. They are everywhere. Lots of people kill them off. I have seen them engulf entire houses if left unchecked. We don't mind them as long as they don't encroach on our space. We can coexist.

I made 2 different blackberry recipes this afternoon. The first one is Blackberry Spice Cake. This is my new favorite cake recipe, hands down. Not only is it just too easy to whip up, you don't need a boatload of blackberries. You only need around a cup or so. You can just eyeball the amount. You don't have to be exact.


This is a simple and delicious cake recipe. I don't feel it needs frosting at all. If you feel the need to put something on it, sprinkle it with powdered sugar. I don't feel it's necessary, however. It can stand alone.


I creamed soft butter with sugar. Then I added in a couple of eggs.


The spice mixture is cinnamon, allspice, cloves and nutmeg.


I picked out a cup of some of the best looking berries and added those in.
Then, while this was baking, I put together an Apple-Blackberry Pie.
The apples came from our orchard.


So, you'll get a bonus blackberry recipe in this post!


This cake is so delicious! I'm hoping I can make it with frozen berries and not have a purple cake. We shall see later on.


And the pie turned out great. It wasn't cooled down by the time I started writing this post, so we'll wait until tomorrow to cut into it.

Blackberry Spice Cake
*Makes one 9x9-inch cake (9 generous servings)

1 cup fresh blackberries
2 cups flour
1/2 cup soft butter
1 cup sugar
2 eggs
1 teaspoon baking soda
1 teaspoon cinnamon
3/4 teaspoon nutmeg
1/2 teaspoon allspice
1/2 teaspoon cloves
1/2 teaspoon salt
3/4 cup buttermilk

Preheat oven to 350 degrees. Spray a 9x9-inch baking pan with nonstick cooking spray. Mix dry ingredients together in a small bowl. Set aside.
Cream butter and sugar together. Add eggs. Add half of the dry ingredients alternately with the buttermilk
Fold blackberries into batter very gently so that you don't break them up. Spread evenly into baking dish.
Bake 45-50 minutes or until a toothpick inserted in the middle pulls out clean.
Cool completely before cutting.


Apple Blackberry Pie
*8 servings

Pastry for a double 9-inch crust
5 cups peeled, cored and sliced tart apples
1 pint fresh blackberries
1 tablespoon lemon juice
1 cup sugar
1/4 cup cornstarch
2 tablespoons butter
1 egg
1 teaspoon water

Preheat oven to 375 degrees.
Line pie pan with bottom crust.
Mix sugar with cornstarch in a small bowl and set aside. Peel, core and slice apples and toss with lemon juice. Add sugar mixture to apples and toss to combine. Gently toss in blackberries. Add to pie shell. Top with other crust and crimp edges.
Mix egg with a bit of water. Brush over the entire top crust. Cut several vents into top crust to release steam. Bake for 50-60 minutes or until filling is bubbly and the top crust is golden brown.
Cool thoroughly before cutting.

Enjoy!