Showing posts with label propane cooking. Show all posts

Wednesday, April 20, 2022

Spring Frittata

 We decided to have a veggan meal today. Not vegan. It's veggan. Veggans eat eggs. It's spring. I have some fresh veggies in my fridge. I felt like making a quick meal and that would be a Spring Frittata. This is fantastic served with toast or with a green salad. We made a couple of pieces of toast from that loaf of bread I baked off yesterday.

This recipe starts out with a bit of milk and a cast iron skillet. It doesn't matter what type of milk. You can use whole milk (like I did), you can use 2%, you can use skim, you can use half and half...you can even use oat milk, if that's what you like! It doesn't matter. Just use what you have or what you want.


Next, you crack 6 eggs into the milk. I added in some herbs and freshly cracked black pepper before I mixed it all up.


I used a Penzey's Spice blend called Parisien Bonnes Herbes.This blend contains chives, dill, basil, tarragon, chervil and white pepper. It's absolutely delicious and it's right up there in my top 3 favorites from Penzey's.


Next up, I opted for some nice spring type flavored veggies. I used some spring onions, frozen peas and asparagus.


Just measure out your veggies so that they total one cup. 


These get cooked in a tablespoon of olive oil for about 7 or 8 minutes. You don't have to cook them that long. You could just sprinkle them over the eggs, but for Bob, they have to be cooked. I'm okay with that. 


Preheat your oven to 350 degrees. Add your beaten eggs in. Sprinkle the top with 1/3 cup of cheese (again, whatever cheese you like will work). I used pepper jack. This goes in to the oven for 20 minutes and it comes out like...


This was our veggan dinner tonight. 


So, this dinner was completely from scratch and that includes the strawberry jam, as well.


Spring Frittata


6 eggs
1/4 cup milk
1/3 cup grated cheese
1 tablespoon olive oil
1 cup total chopped spring onions, asparagus and frozen peas
1/4 teaspoon sea salt
1/8 teaspoon black pepper
1 teaspoon Penzey's Parisiene Bonnes Herbes herb mix

Preheat oven to 350 degrees.
Whisk eggs with milk, pepper and herb mix.
In cast iron skillet, saute vegetables in olive oil for 5-8 minutes, sprinkle with 1/4 teaspoon salt. Add egg mixture, shake to distribute evenly.
Put in preheated oven. Bake 20 minutes. 


Friday, June 11, 2021

Asian Chili Oil...As Promised

I promised everyone on Facebook that if they would help me get this blog up to 20 followers, I'd cut loose with my chili garlic oil recipe. This recipe is something that I keep in my fridge at all times because I drizzle it on everything. I do not buy chili oil from the store. Making my own tastes so much better. I start out by toasting some sesame seeds over low heat until they start to turn brown and get a nutty flavor. As a matter of fact, since it's raining out, today would be a good day to simply toast up a batch of sesame seeds to just have on hand.
Here are the aromatics that will get infused into the oil. It is not simply chilis, oil and garlic. Nope. There's much more flavor in there. Let's talk about some of these aromatics.
First, there are Szechuan peppercorns. What these do is give your tongue a numbing sensation. I use them quite often when cooking spicy Asian dishes and they are something that I always have on hand.
I also use green cardamom pods. These are optional, as are the whole cloves. You don't have to add them, but since I have them on hand, why not? The rest of the must have aromatics are star anise, a stick of cinnamon and a couple of bay leaves.
This was the ingredient that I was waiting on. I order it from Amazon because there are no supermarkets, in my area, that carry gochugaru. Gochugaru is Korean red pepper flakes. These are delicious.
You use any neutral flavored oil. I chose to use avocado oil.
The aromatics, along with a couple of scallions and a couple cloves of smashed garlic get infused into the oil, over super low heat for as long as it takes for the onion and garlic to get quite brown. It can take up to an hour.
After that, you pour the oil through a strainer to strain out all of the aromatics leaving you with just the flavored oil.
Pour the oil very slowly over the gochugaru in a heat proof container (I use a stainless bowl) as it will bubble up. After that, stir in the toasted sesame seeds and sea salt to taste.
Store in the refrigerator. This oil will last up to 6 months when properly stored.

Asian Chili Oil

1-1/2 cups avocado oil (or any other neutral flavored oil, like canola or vegetable)
4 whole star anise
1 cinnamon stick
2 bay leaves
1 tablespoon Szechuan peppercorns
5 green cardamom pods
1/2 teaspoon whole cloves
2 scallions, white parts only
2 cloves garlic, smashed
3/4 cup gochugaru
1 tablespoon toasted sesame seeds
1/2 teaspoon French grey salt (or whatever salt you like)

Combine the first 9 ingredients in a heavy bottomed saucepan and cook, over very low heat, until the garlic and scallions are quite brown and fragrant.
In the meantime, add the gochugaru into a heat proof bowl. Measure out the salt and sesame seeds into a small bowl and set aside.
Once the oil has been fully infused and is very fragrant, pour S-L-O-W-L-Y through a fine mesh strainer over the top of the gochugaru. This will bubble up very vigorously. Once you've poured all of the oil in, add in the sesame seeds and salt. Stir well (I use a chopstick for this). Cool to room temperature, pour into a container with a tight-fitting lid and store in the refrigerator for up to 6 months. Use whenever you need a kick of chili flavor.
 

Thursday, June 10, 2021

Maangchi's Galbi Grilled Ribs With Green Onion Salad Side Dish

 I'm hoping that Maangchi will like another one of my posts on Twitter. It makes my entire day when she does. I can't help it, though. She has so many great recipes that just appeal to me.


Last night, I made 2 of Maangchi's recipes. Bob was not able to partake of kimchi or the green onion salad, so I eyeballed the onion salad to make enough for just one person. It was spicy and delicious and it completely hit the spot with me. I plan on using the superfluous kimchi in another Maangchi recipe. I haven't made kimchi yet because I have very limited refrigerator space and, living in a fifth wheel, I just really don't want either my indoor, or my outdoor kitchens smelling like it. So, I simply had Bob pick up a jar that was alive with all the good stuff that kimchi has in it. I plan on using the rest of the kimchi to make another Maangchi recipe and then I think I'll move onto a different type of cuisine for a while.
I'm just trying to use stuff up. 


I grow green onions out in my raised beds. I did quite the thinning on them. They are huge! I planted over 300 and I've been able to share with a few of the neighbors, which is cool. I've even shared onions with Ginger (you'll see her commenting every now and then on here...she's my younger sister). Anyhow, you can't have a green onion salad side dish without green onions.
Both recipes have scallions in them.


The Galbi Ribs start out with short ribs. You do not want the flanken style for this, you want the meatiest short ribs you can find. Unfortunately, these were the best that the store had and, at $7.99 per pound, I feel we paid for bones. You can't win them all. Soak these in cold water and pat dry. 


Next, you cut the meat out, so that it makes as long of a strip as you possibly can. These get sprinkled with sesame oil, sugar, salt, scallion and chopped garlic.
Here's where I make a confession. I forgot to add the garlic until just before I cooked these. It happens. You'll want to pat/smack all these ingredients into the meat and then roll them back up...

like this.
Put them in the fridge for a couple of hours to marinate.
In the meantime, make the Green Onion Salad side dish. 


This salad usually gets put into the lettuce/perilla leaf bundles along with the Galbi. Click here and scroll down for the recipe.
I could eat this salad every single day. I'm not thinking that my stomach will thank me, but my taste buds sure would!


These ribs are best cooked over charcoal, but I used my grill pan. You unroll them and start searing. 

Let them get some crispy edges. Just keep turning them back and forth. 


Then use scissors to cut up into bite-sized pieces. Let those cook until there's no longer any pink on the outside of the meat. After this is when you, traditionally, set out a plate of lettuce or perilla (or both) leaves, some ssamjang, slices of raw garlic and some Green Onion Salad.
Bob is going to be starting to get some extensive dental work done, so, hopefully, when that is all over, he will be able to eat one of these bundles. 


So, this is how we enjoyed these delicious Maangchi recipes last night.

Thanks, Maangchi!

Saturday, June 5, 2021

Charro Beans with Garlic Scapes

I'm not sure what it is about food that takes a long time to cook, but I love it. If I don't have to dig out anything other than a large pot, I love it even better. If I can utilize something out of my garden, I love it even more. And, if it contains, not only bacon, but Mexican chorizo and ham...well, there's not enough words to describe how much I love it!


Garlic scapes. These are beyond delicious!!

 I harvested my garlic scapes and I didn't want to do the traditional compound butter with them. I wanted something a bit different. I've been saying, for the past week, that I wanted to make Charro Beans. I used the YouTube channel Views From The Road version as my base recipe. You should hit their subscribe button. They are a YouTube treasure.


Bacon, ham and chorizo all combine together to make something that is just amazing, as far as flavor goes.

This is making the entire fifth wheel smell delicious!


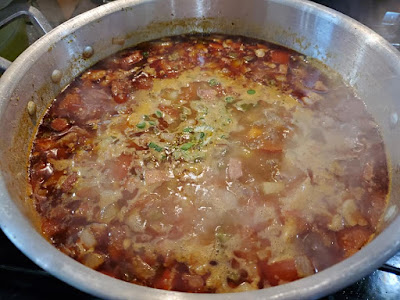
No. I am not digging out my Ninja Foodi. I'm not cooking the bacon separately in a frying pan. I cooked everything together in the same pot after soaking the beans overnight. This just gets cooked, on the stove top, over low heat.
The knobs on these propane stoves have a purpose and don't be scared to cook over propane. I'll have a hard time ever using an electric stove again, for sure!


Charro Beans with Garlic Scapes


1 pound soaked pinto beans, rinsed and drained
6 slices of bacon, thinly sliced
1 pound Mexican chorizo
1 cup cubed ham
1 yellow onion, diced small
2 jalapeno peppers, seeded and diced
1/2 pound chopped garlic scapes (reserve flower pods for something else)
2 large chopped tomatoes
1 half bunch roughly chopped cilantro (including stems)
3/4 teaspoon ground cumin
1 teaspoon dried oregano
1/2 teaspoon chipotle powder
1 teaspoon chicken bouillion powder
1 cup chicken stock
1 bay leaf
Salt & pepper, to taste
8-9 cups water

Soak beans overnight in water, salted (1 teaspoon), that covers beans by 2 inches. Rinse well, drain and set aside.

In a big pot, over low heat, cook bacon until fat is rendered, but the bacon is not crisp. Add in chorizo (I used the beef type, but pork would work just fine), cook for about 3-5 minutes. Add onion and jalapenos along the garlic scapes. Cook for 4-5 minutes. Add tomatoes and spices with chicken stock. Add enough water to cover, around 8-9 cups. Cook, over low heat, simmering, for about 2-3 hours, or until beans are soft. Taste for salt and pepper. Add cilantro in and cook for another 15-20 minutes.
Serve with tortillas or corn bread.