Showing posts with label chicken. Show all posts

Wednesday, March 9, 2022

Hawaiian Shoyu Chicken

 Bob has an upcoming medical procedure that I won't go into on a cooking blog. Anyhow, tonight is the last night he can eat a regular diet. After this, for a few days, he goes on a low fiber diet and then a straight liquid diet. Anyhow, he shoveled a yard and a half of soil for me today and filled several raised beds. He deserves a tasty dinner on his last night of normal food for a while.


I ordered the shoyu sauce from Amazon. Here is what I ordered. It's not the cheapest stuff on the planet, but I don't think you could really make Shoyu Chicken without it.


This recipe is made using skin-on, bone-in chicken pieces. You'll want roughly 2 pounds. What pieces you use is entirely up to you. I chose thighs. I'd make this recipe using wings, too.
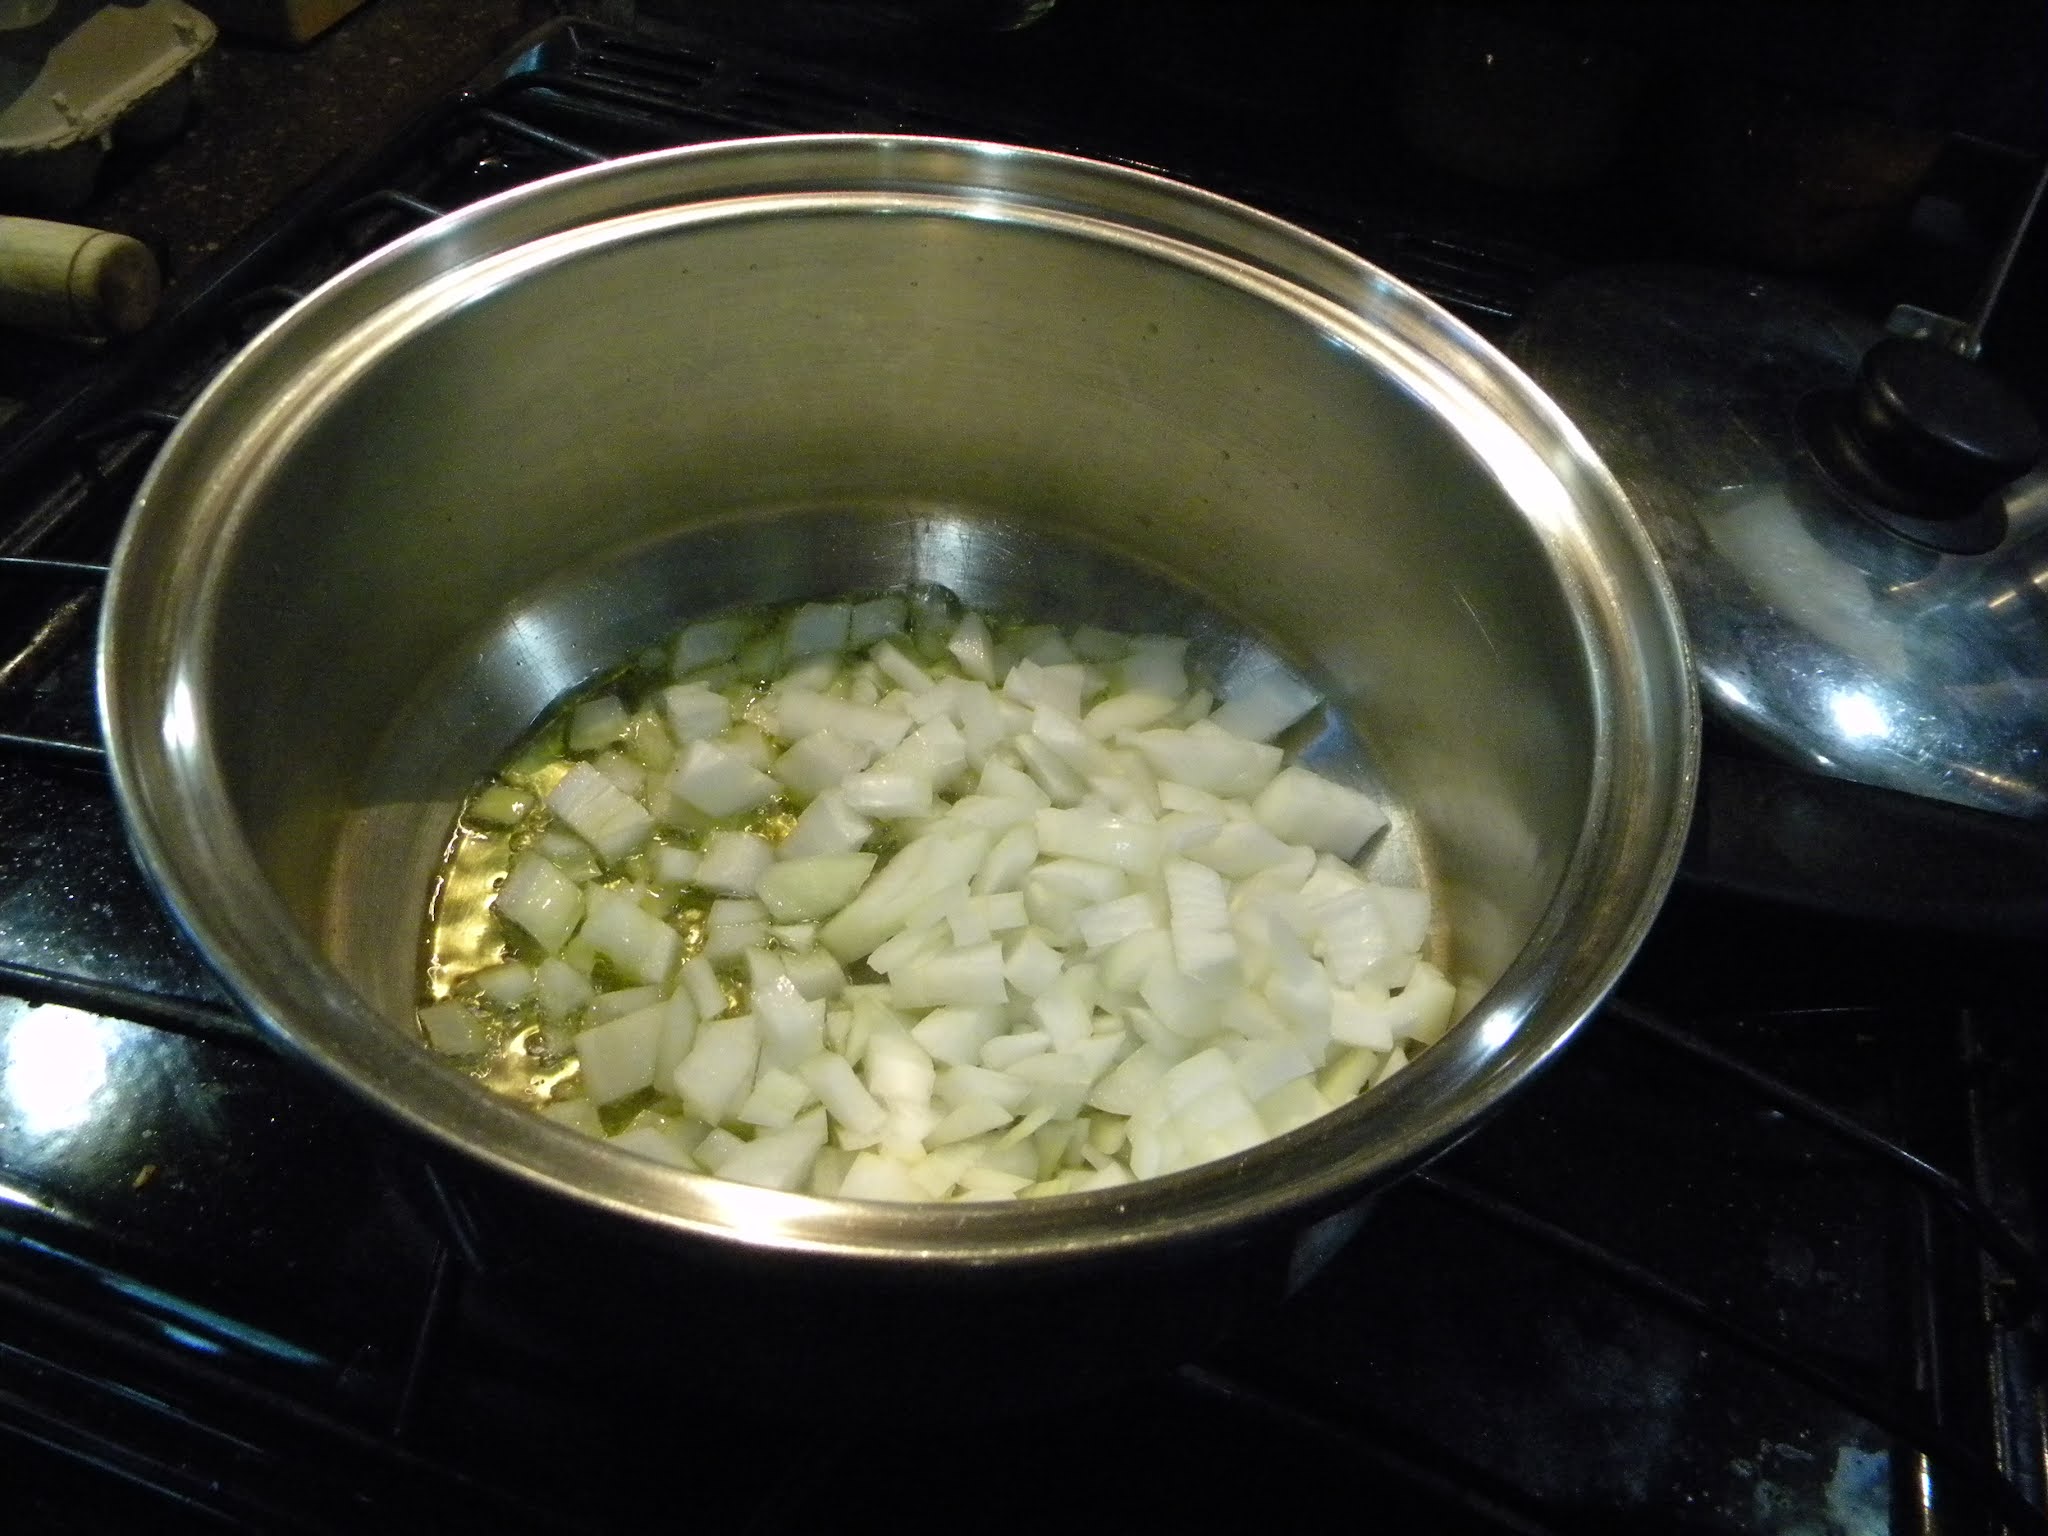
You want to brown them in a tablespoon of oil. I use canola as it is a heart healthy neutral flavored oil. Again, in your kitchen, use what you want. I probably wouldn't use olive oil, though. Thoroughly brown the chicken on both sides.


While the chicken is browning, mix up the sauce (see recipe below) and prep the ginger and the garlic. 


Definitely make sure the chicken is browned. It will make a difference later on. Be patient. Don't rush it.


After the chicken is uniformly golden color, add the sauce, ginger and garlic. Bring to a boil, lower the heat to low, cover and simmer for 10 minutes. Turn each piece over, cover, simmer another 10 minutes. 


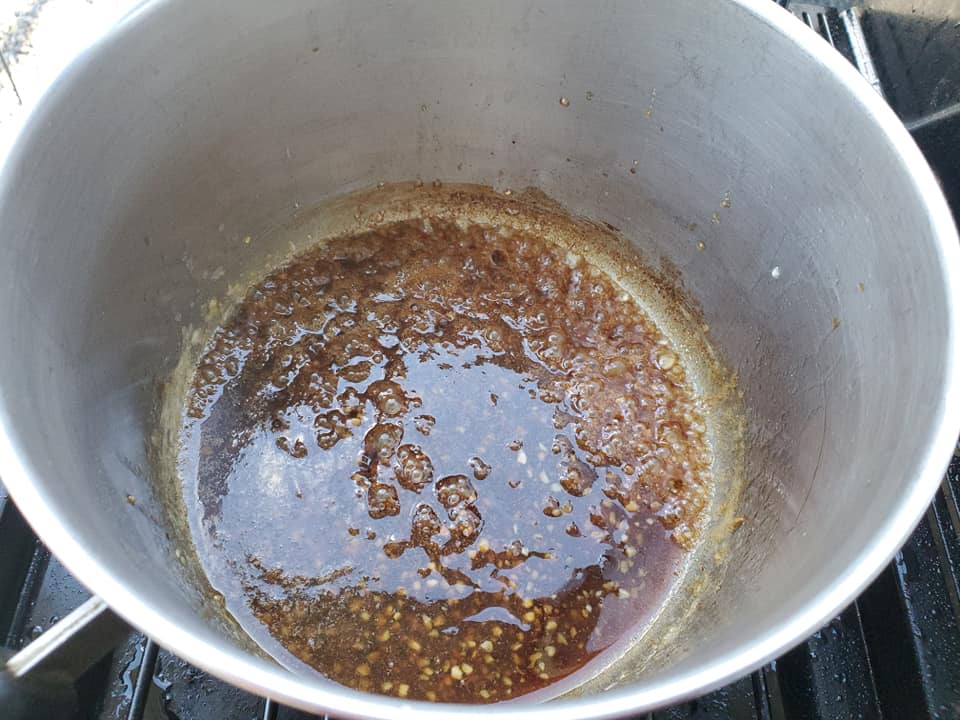
After 20 minutes, the chicken will be a dark brown color. This is when you remove the lid and turn up the heat a bit and start cooking down the sauce. 


As the sauce reduces, it coats the chicken pieces and turns them mahogany. Keep boiling until you have a sauce that is the consistency of syrup.


This is just damn delicious, no matter how you want to look at it.


I served this with some coconut rice and some Hawaiian Mac Salad.

Aloha!


Hawaiian Shoyu Chicken

2 pounds chicken pieces
1 tablespoon canola oil
1/2 cup shoyu soy sauce
1/2 cup water
1/2 cup sugar
2 tablespoon rice vinegar
4 cloves garlic, smashed
2 inch piece of ginger, peeled and thinly sliced

Brown chicken in a skillet, over medium heat, in a tablespoon of oil. In the meantime, in a medium bowl, whisk together shoyu sauce, water and sugar. Set aside.
When chicken is golden brown, add the sauce mixture along with the garlic and ginger. Bring to a boil, cover, reduce heat and simmer for 10 minutes. Turn chicken over and repeat.
When chicken has simmered for 20 minutes, remove lid and turn heat to medium-high and reduce sauce until it is the consistency of syrup, continually basting and turning the chicken pieces to coat.
Serve with rice.

Wednesday, February 16, 2022

Belgian Fried Chicken

 We're all moved! We moved exactly a month ago. A lot has happened. We went through a pretty bad flood just before we moved. Bob's car got flooded. Our insurance totaled it. Ten days later, we were fully moved out of the RV park. Good riddance to the drama and other nonsense. It's so peaceful up here and we're thoroughly enjoying it.
Here are some of the flood photos. We are sitting up on a bluff, 260 feet above a creek. I don't ever have to worry about going through a flood, like this, again. 


The water came up and receded all within an 18 hour time frame. I have never went through anything like that before and I hope I never go through anything like that again.


I'm not going to miss this at all. Nope. Never again.

Now, without further adieu, coming to you from Kelpie Kapers Farm, I bring you one of our most favorite chicken recipes called Belgian Fried Chicken.
First off, this is not a diet friendly recipe. If you're looking for something healthy, you'll want to cruise on past. We don't eat this all that often, maybe 2 or 3 times per year. If you can use decadent to describe a chicken dish, this one would fit the bill. 

First off, there's not really any measurements for this recipe. The only thing I really measure, and it's haphazard at that, is the butter. I just use 1/2 a stick of unsalted butter and it doesn't matter how many pieces of chicken I plan on making. Just know that you're going to be frying chicken, over a low heat, for a long time, in butter.
Do I have your attention yet?

You simply salt and pepper your chicken pieces generously. Then you shake in plain ol' flour. Don't add anything to it, just leave it plain.
You won't believe how tasty this is with such minimal seasoning. There's no herbs or spices in this besides salt and pepper. None. Nada. Zip. Zilch.


This is why I call this "Belgian" fried chicken. This is a sliced up Belgian endive. If you don't want to use an endive, you could slice up some mushrooms or whatever vegetable you like. I've done this with just onions and parsley and it was delicious.


After the chicken browns, slowly, over low heat, for 15 minutes on each side (a total of 30 minutes), covered, you scatter the endive around the pan, put the lid on and let it go for another 15 minutes. So, yes, 45 minutes being fried in butter. 


The endive cooks way down and the chicken gets really brown. This is when it gets hit with the zest and juice of 1 lemon. So, now, it's being fried in lemon butter. Let that cook for just a few minutes. And pour in roughly 1/4 to 1/3 of a cup of heavy cream, depending on how many chicken pieces you're making. 


Delicious!

Belgian Fried Chicken
*serves 2

4 pieces of bone-in, skin-on chicken
1/2 cup flour
Salt & pepper, to taste
1/4 cup unsalted butter
Zest and juice of 1 lemon
1 Belgian endive sliced
1/4 cup heavy cream

Salt and pepper the chicken pieces generously. Coat each piece in plain white flour.
Melt butter in a heavy skillet over medium-low heat. Fry the chicken, in the butter, for 15 minutes, covered. Turn the chicken over, cover, and fry another 15 minutes. Add endive, cover, fry for another 15 minutes. Add lemon juice and zest and cook for 3-5 minutes more. Add heavy cream and flip the chicken pieces around so that they are coated in the sauce and the heavy cream mixes in.


I turned these into bowls with rice and boiled asparagus. Bob really enjoyed these. He gets his final set of impressions tomorrow, so, hopefully, I can make something crunchy for dinner soon. Korean Honey Butter Chicken is on the top of my list!
Anyhow, if you need some comfort food, this Belgian Fried Chicken will fit that ticket, for sure.
Enjoy!

Friday, November 19, 2021

Smoked Bleu Cheese Stuffed Chicken Breasts Wrapped In Bacon

 Last week, I wound up buying a container of smoked bleu cheese. I had initially thought that I would include this on Bob's requested charcuterie board for Thanksgiving, but I thought there was more than plenty to remake one of my published recipes on allrecipes.com, Gorgonzola Stuffed Chicken Breasts Wrapped In Bacon. I used to prepare this recipe quite often, several years ago, but had gotten away from it. It's always nice to revisit (and revamp) one of your highest rated recipes, I think.

I got away from adding anything to the bleu cheese. I figured with the smoke flavor, it didn't need any added ingredients, like shallot or parsley. Also, with the bacon and the cheese, this definitely did not need any added salt.


This also differs from the original recipe in that I baked these on a rack this time.


I baked these on a lower temperature than I did with the original recipe. I found that lowering the temp, even though I had them in the oven for over an hour, resulted in a much juicier version. These were not dried out at all.


Dinner, last night, was a sheer pleasure.


Smoked Bleu Cheese Stuffed Chicken Breasts Wrapped In Bacon


2 boneless, skinless chicken breasts
1/4 cup smoked bleu cheese
4 slices of pepper bacon
1 tablespoon extra virgin olive oil
1 teaspoon Penzeys Spices Parisien Bonnes Herbes blend
Cracked black pepper, to taste

Preheat oven to 350 degrees. Cut a pocket into each chicken breast, without cutting all the way through. Stuff 2 tablespoons of smoked bleu cheese into each pocket. Wrap each breast with 2 slices of bacon. Secure with toothpicks, if necessary. Sprinkle each breast with 1/2 teaspoon of Parisien Bonnes Herbes blend. Sprinkle with freshly cracked black pepper.
Place in oven and bake for 45-60 minutes, or until chicken reaches an internal temperature of 165 degrees F on a food thermometer. Let stand for 10 minutes, remove wooden picks and serve.


Saturday, September 18, 2021

Chicken & Dumplings

 I had Bob buy that rotisserie chicken yesterday. I made enchiladas with half of the meat. To view that  recipe, click here. Tonight's Chicken & Dumplings utilizes the other half of the meat and the carcass. This recipe took me all afternoon to complete and was worth every minute.


I boiled the carcass with all the vegetables that I had that were starting to dry out or look tired. I love that this is a great way to clear out the crisper drawers of stuff that I had just hanging around. I didn't bother to peel anything. I threw in bendy carrots, celery (that was way past its prime), half of a sweet potato. I let it cook down for about 3 hours. 


I strained it out and I was left with some fantastic looking broth. 


This is only the first part of this recipe. Congrats, you're advancing to level 2.

I wanted to do these two recipes to show how economical it can be to buy a rotisserie chicken, especially if you are feeding just 2 people. My sister always jokes with me because I'm not usually one who takes all this time to do things. I usually have several things going on at once. Anyhow, I was watching a YouTube video last night on how to make your food budget stretch and I got to thinking about just how much food is simply thrown away. It's appalling, if you think about it. So, I was determined to get every cent's worth from that rotisserie chicken. 


We just so happened to get our first storm of the year today. I don't think I'd really call it much of a storm, though. There was a bit of thunder and lightening and it did pour down rain a few times. I have to admire the grit of these two fishermen. They were dedicated there on the opposite bank of the river.

I salute them!


The next half of this recipe starts out by boiling the reserved chicken meat and whatever veg you like in the chicken stock that you just made.
There's no right or wrong way to do this because taste is subjective.
I used onion, garlic, celery, carrots and a parsnip. I thought I had another sweet potato, but it was purple and I didn't think that would look so nice. I wouldn't care but I knew I was going to take photos of this for this blog post and purple...not so much.


I let this come up to a boil with everything in it and cook until everything was soft enough to mush against the roof of your mouth with your tongue. 


This is sure comforting on a rainy day, I do have to say!


Chicken & Dumplings


1/2 of the meat from a rotisserie chicken from the supermarket
The carcass of the chicken
Any vegetables that you want to sacrifice to the stock pot
Enough water to cover
Salt and pepper, to taste

Boil all this together in a large pot and strain the solids out and throw those away. Put the rest back into a pot. Add the chopped meat, chopped vegetables, like celery, carrot, onion, garlic and parsnips. Add as many or as little vegetables as you like.
To that, add salt and pepper, to taste, 1-1/2 teaspoons Penzey's Bouquet Garni spice blend, 1 teaspoon dried parsley and some chopped fresh rosemary, optional. I grow it, so I always have it on hand.  Bring all to a rolling boil, lower heat to low and simmer until the vegetables are very soft. Add 3/4 cup of heavy cream to the soup.
Make dumpling dough.

Dumpling dough:

1 cup flour
1/2 cup heavy cream
1/2 teaspoon salt
2 teaspoons baking powder
1 teaspoon dried parsley

Mix all ingredients together until a dough forms. Drop by spoonfuls into liquid. Cover, cook about 20 minutes or until dough is cooked through.

*Please not that I am not compensated by Penzey's Spices. I just really like their products and use a ton of them.

Friday, September 17, 2021

Chicken-Green Chili Enchiladas

 Since Bob had all of his teeth pulled, it's been a struggle to find foods that he can eat because he has the added problem of having scar tissue in his throat, from the radiation treatments when he had throat cancer. He has to eat softer foods because he can't chew it up and certain things will hang up on that scar tissue and choke him. His medications do that to him all the time.
Anyhow, I digress.

We ordered some Mexican delivery for dinner the other night and Bob decided to give enchiladas a whirl. He ate them. He enjoyed them. I'll make enchiladas for him.


One thing that I think we're going to do more of, simply because it's cheaper for us to do so, is buying rotisserie chickens from the supermarket. There is a supermarket, here in town where the majority of the shoppers wear masks, that I will venture into. They sell their rotisserie chickens for like $6.50 or something. I cannot buy a whole chicken for that price very often. This week is one of those weeks, but I haven't placed my grocery order yet. I sent Bob for a chicken and some corn tortillas. 


Now, this rotisserie chicken is going to make 4 meals for us, 2 meals of enchiladas and 2 meals of what I'm going to make a blog post about tomorrow...5 if you count the chicken stock that I'll cook down, but I'm using that for meals 3 and 4, so I'm not counting it. We'll have enchiladas again on Sunday.
I pulled the meat off half of the chicken and cut it all super small for Bob. Next, it's as easy as opening a can of enchilada sauce, a can of green chilis and opening up a package of shredded Mexican blend cheese. 

Now before anyone goes off about these not being "from scratch", let me just say that I realize that. I'm working with a food budget and I try to stretch my dollars so that I can get a bit more of food put up so that we can enjoy the summer flavors this winter. My thinking is that the more economical I can make our dinners, the more of my budget I can spend on fruits and veggies to can up. I am tossing all of my previously canned up goods. Our shed had gotten rats in it and with those boxes of jars stacked on each other, I don't feel safe consuming any of it.


But I did feel entirely safe consuming these! Bob bought the street taco sized tortillas. At first, I thought that they would be WAY too small, but they were perfect sized. I made us each 3 enchiladas. I have enough filling, cheese and tortillas for another batch on Sunday and all we need to purchase is a 15-ounce can of enchilada sauce.


So, this may not be all from scratch, but it is delicious and it's economical and, all together, it will make 4 servings of 3 enchiladas each. 


Chicken-Green Chili Enchiladas
Makes 4 servings

1/2 of rotisserie chicken, chopped
2 tablespoons minced sweet onion
1 4-oz. can mild green chilis, drained
1 15-oz. can red enchilada sauce, use 1/4 cup on a deep plate to dip tortillas in, use 1/3 cup in the chicken mixture and use the rest add a thin layer of sauce to the bottom of the baking dish and to pour over the top of the enchiladas
1/2 cup sour cream
2 cups shredded Mexican blend cheese (or cheddar)
2 green onions, chopped
12 street taco size corn tortillas

Preheat oven to 350 degrees.
Shred chicken, put in a bowl and mix with onion, chilis, sour cream and 1/3 cup enchilada sauce.
Pour 1/4 cup enchilada sauce into a deep plate or pie dish. Dip each tortilla into the sauce, coating both sides, sprinkle a small pinch of cheese down the center of the tortilla, add a few spoonfuls of the chicken-green chili filling, top with another pinch of cheese, roll up and put in a baking dish that has a thin layer of enchilada sauce in the bottom. Place seam-side down.  Repeat for all the tortillas.
Pour remaining enchilada sauce over the enchiladas in the baking dish. Top with remaining cheese and green onions.
Bake 30 minutes, uncovered.
Remove from oven, let stand for 5 minutes before serving.

*You can assemble these and freeze. Use within 3 months. The leftover filling will last for 3 days in the refrigerator.
*I wore disposable gloves while I assembled this dish.

Sunday, July 11, 2021

Tex Mex Chicken & Rice


 There is just something about the flavors of Mexico. I don't think I can recall one single person that I've ever met, over the course of my lifetime (suffice it to say that is over half a decade), who didn't/doesn't like Mexican food.
Tonight, I had leftover rotisserie chicken to use up. We buy whole chickens when they are cheap and stick them in the freezer and, when the urge strikes, we stick one on our rotisserie on our BBQ grill. We rotisserie'd one up for dinner last night. So this recipe utilizes leftovers and on-hand pantry stock items for me. I love it when I can do this!

I used a Walla Walla sweet onion in this dish. You, of course, don't have to use this type. You can use whatever you have on hand. I live in Washington state, I have Walla Walla sweets.
As with any delicious recipe, it starts out with onion and garlic. 


The onion gets sauteed in olive oil. The great thing is that this is a one-pot dish!

I removed the skin, chucked the bones (no room in the fridge today to be able to make broth) and cubed up the meat. 

You'll also need rice. I used what I have on hand and that's basmati. Plain ol' white rice would work perfectly. I wouldn't use Minute Rice. I don't think you'll be impressed with the results. The seasonings are simple: ground cumin, salt and pepper. This recipe also uses canned diced tomatoes, canned diced green chiles and a can of red enchilada sauce. 

After you've sauteed the onion for a few minutes, add in the rice and garlic and cook for a couple more minutes. 

Add in the canned ingredients and the water, bring to a boil, pop a lid on the pan, turn heat to as low as your stove will go and set a timer for 20 minutes. 


I topped with some chopped heirloom tomato and...

chopped avocado. This is a perfect pantry 30-minute meal!


Enjoy!


Tex Mex Chicken & Rice


2 tablespoons olive oil

1/2 of medium Walla Walla sweet onion, diced

2 cloves garlic, minced

1/2 teaspoon ground cumin

1/2 teaspoon French grey salt

1/4 teaspoon freshly ground black pepper

1 cup basmati rice

1 (10-ounce) can red enchilada sauce

1 (15-ounce) can no-salt added diced tomatoes

1 (4 ounce) can diced green chiles

1 cup water

1-1/2 cups cooked chicken, cut into bite-sized pieces

Garnishes (optional): diced avocado, chopped tomato, sour cream, cilantro


In a large pot, with a lid, saute onion in olive oil, over medium heat,  until soft, about 3-4 minutes. Add rice and garlic and cook for another 2-3 minutes. Add spices, cook 30 seconds.
Add all the canned ingredients, along with the water. Then add chicken. Stir to combine. Bring up to a boil, turn heat on stove to as low as it can go. Cover. Cook for exactly 20 minutes. Turn off heat. Let set for 10 minutes. Top with garnishes.


Monday, June 7, 2021

Maangchi's Korean Honey Butter Fried Chicken

Those of you who know me already know that I have cooked my way around the world. Doing that project comes along with some perks, such as knowing what cuisines are freaking tasty! I think that one of both my husband and my favorite countries is Korea. I'm talking particularly about Korean street food. I have a Korean food guru. Sure, there's many great YouTube channels out there. Off the top of my head, I can think of Asian At Home with Seonkyoung Longest. This evening, however, I'm going to feature my Korean cooking guru's recipe of Honey Butter Fried Chicken. To get a better idea of how to do this recipe, simply watch Maangchi's video on YouTube.

I refuse to fry inside of the fifth wheel. I do not want to clean that up...ever. Ever. EVER! I like to set everything up, in an order that makes sense to me, on our gas grill. I also use my only cast iron skillet that I have in the trailer. It's a pretty small one, but it works fine for the two of us.
I use wings that I cut down. These are what Maangchi suggests and that's what I did. There is a reason that I do not deviate from this magnificent recipe and I'll tell you all why that is further down in this post.
I don't use a thermometer. I use a wooden chopstick to test to see how hot my oil is. The side burner of our gas grill can get really hot, so once I get my first batch of breaded wings in to fry, I cut that heat back to a bit less than halfway. You'll have to figure out how your stove/burner works.
I fried up this chicken in 2 batches. Each piece of chicken will be fried for 5 minutes TWICE on each side. You cook for 5 minutes, flip over, cook for 5 minutes, flip back over, cook for 5 minutes and then flip over for the final 5 minutes. Do not deviate from this. This is the third time I've made this recipe. The first time, I cooked everything precisely as Maangchi said to. The second time, I thought I knew better and I screwed the whole thing up. The third time, I went back to exactly how Maangchi said to do it and they were just as delicious as the first time. Make sure to follow the recipe and the cooking times.
This is the final fry before removing to a metal strainer to drain over a stainless bowl.
Let them drain just like this. Eventually, all your pieces of chicken should wind up in the strainer. That's when you let the oil heat for a minute and you put everyone back into the hot tub for their second fry. These are double fried and that is why they are so extremely crunchy!
This is the honey butter sauce that the wings will be tossed in.
These are finished wings. Let me know if you make these! I totally fan girl on Maangchi because she liked one of my Tweets that I mentioned her in before. Thank you, Maangchi!