Showing posts with label homemade. Show all posts

Monday, April 4, 2022

Asian Orange Chicken

 I've been craving Asian food something fierce lately. I can't just order Door Dash any longer living where we do. So, I put in a grocery order and I dug out my Asian ingredients and went to work. It was time to make my weekly grocery order anyhow.


I can't say as I was very pleased with the orange that Fred Meyer picked out for me. It was half green. It's a good thing that I only needed a teaspoon of zest or they would have heard from me.


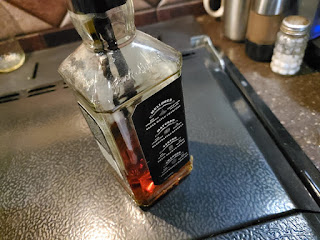
I bought some rock sugar at an Asian market last week when we went to Vancouver. I've been anxious to try it out.


I also minced up a whole lot of garlic.


I bought a 2 pound pack of chicken tenders. I used half tonight and baked off the other half to use for tomorrow night. I'll be making Arroz Chaufa (Peruvian Fried Rice). 


Asian food requires scallions. I don't care what type it is. I don't care which country's cuisine it is. Green onions are required.


The sauce. It has soy sauce in it. There's also orange juice, orange zest, apple cider vinegar, rice wine vinegar and some hot sauce.


The chicken gets cut up into bite-sized pieces and coated in some cornstarch.


I fried the chicken up in batches.


After it was all browned and cooked through, I added all the chicken back into the pan, scooted it to the sides and added in the garlic and rock sugar. 


After the rock sugar melted down, I added the sauce. It thickens pretty fast. 


Add in the scallions and toss them in the sauce.


YUM! You'll never need to order Orange Chicken again! Serve over hot rice.


Asian Orange Chicken

1 pound boneless, skinless chicken breast, cut into bite-sized pieces
1/2 cup cornstarch
2 tablespoons avocado oil
4 green onions, thinly sliced

For the sauce:
1/2 cup orange juice
1 teaspoon orange zest
3 cloves garlic, minced
1/2-1 teaspoon (or more) Sriracha sauce
1/3 cup chicken broth
1 ounce rock sugar (or just use 2 tablespoons of granulated sugar)
2 tablespoons soy sauce
2 teaspoons apple cider vinegar
1 tablespoon rice wine vinegar
2-1/2 teaspoons cornstarch

Mix all the sauce ingredients except for the garlic and rock sugar. If using granulated sugar, mix it into the sauce, as well. Set aside.
Put 1/2 cup cornstarch into a plastic bag and shake the chicken pieces in it. Remove and shake off excess cornstarch.
Heat oil in a wok or skillet over high heat. Brown the chicken in the avocado oil, in batches, until lightly browned.
Once all the chicken is browned, add all the chicken back into the pan and scoot to the sides. Add the garlic and rock sugar to the pan and cook for about 30 seconds or so, until you can smell the garlic and the rock sugar melts down. Add the sauce in and stir until very thick. Toss to coat the chicken thoroughly. Add in green onions and toss once more. Serve immediately over hot rice.

Thursday, September 30, 2021

Vanilla Bourbon Cheesecake

 I may be channeling my inner Golden Girl here, but is there anything more delicious and decadent than a homemade cheesecake?
It's getting to be that time of year when everything turns to pumpkin spice, apples and all those delicious fall favorites. To me, it means that it is time to create a new cheesecake.


I have another blog post about making homemade vanilla extract. Click here to view that post. I find that vanilla and bourbon are a marriage made in heaven. I don't buy vanilla flavored spirits, but I will certainly make my own! I used some of my homemade vanilla Jack Daniels in this creation. These flavors scream fall to me.


This recipe starts out with 32 ounces of room temperature cream cheese. Do not use a lower fat or fat-free type of cream cheese. Now is not the time. Use the full-fat variety. Make sure it's at room temperature. Make sure all of your ingredients are at room temperature.


The first thing you want to do is spray a 10-inch spring-form pan with nonstick cooking spray. Then, assemble your graham cracker crust. Make sure to use brown sugar in your crust. It makes a difference in how the taste of the crust melds with the taste of the cheesecake.


Here is a photo of my homemade vanilla Jack Daniels. This is such a delightful fall flavored ingredient.


Everything gets blended up. Again, to reiterate, make sure all of your ingredients are room temperature.


The cream cheese mixture gets poured into the crust and it bakes up in just over an hour into something extraordinarily decadent and delicious.


Vanilla Bourbon Cheesecake


For the crust:

1-1/2 cups graham cracker crumbs
2 tablespoons pure cane sugar
1 tablespoon dark brown sugar
7 tablespoons melted unsalted butter

For the filling:

32 ounces cream cheese, room temperature
1 cup pure cane sugar
2/3 cup sour cream, room temperature
4 large eggs, room temperature, lightly beaten
1 pinch of sea salt
3 tablespoons vanilla infused bourbon

Preheat oven to 325 degrees.
To make crust:
Mix all crust ingredients in a large bowl and press into bottom of a 10-inch spring-form pan. Set aside.

To make filling:
Blend cream cheese, with a mixer, until light and fluffy. Beat in sugar until it is dissolved. Add sour cream and mix to just combine. Add eggs, one at a time, mixing to just combine. Add salt and vanilla infused bourbon.

Pour into prepared crust. Put in preheated oven, on center rack, for 75-85 minutes, or until the center looks jiggly, much like jello. Turn off the oven and prop open the oven door with a wooden spoon and set a timer for 1 hour. After 1 hour, remove cheesecake from oven to a rack to cool for another hour. Chill in refrigerator at least 6 hours to overnight.
Refrigerate leftovers.

Saturday, September 11, 2021

Homemade Vanilla Extract

 Vanilla is a necessity in any baked good. Any rich chocolate dessert that is delicious beyond belief has vanilla in it. Describing vanilla is like attempting to describe a color. It's strongly aromatic and it's warm, floral flavor gently and distinctly compliments many other spices and foods.

Most vanilla is grown in Madagascar, the world's fourth largest island, which, in the past 20 years, has experienced 35 cyclones, 8 floods and 5 periods of severe drought. 

Vanilla is an orchid. There are hundreds of types of orchids, but only one, the vanilla planifolia, produces vanilla beans. They are finicky and very hard to keep alive. I keep thinking back to all those times, in my younger years, that I bought an orchid and brought it home and tried to keep it alive. I failed every single time. I couldn't even imagine trying to grow one outdoors!

Vanilla orchids have a short flowering season and each one has to be hand pollinated by someone who knows what they are doing. Hand pollination is a difficult process. Once harvested, the job is not over, either. From growth to export, the entire process takes about a year.

For a while, consumers were content with synthetic vanilla flavoring, which can be bought for super cheap. Today, it's trending that we only use the real stuff, so that drove up the cost of vanilla beans. They are roughly $300 per pound. This is the most labor-intensive spice to grow and it is the second most expensive spice in the world. It costs us, the American consumer, roughly $20 for 4 ounces of real extract.

So, when I was able to find some Tahitian grade B vanilla beans, 10 for less than $15, I was all over that deal! I decided to make my own extract. I started into this with a pint of Jack Daniels and a couple of vanilla beans that I wound up buying from Penzey's Spices (on a side note, here in a few weeks, stay tuned for a great opportunity, that is not sponsored, that the RV Park Homestead will be hosting. A clue is Penzey's Spices!). I was hooked. That was THE BEST extract ever! There is something about chocolate and that sour mash that is just magical to the taste buds! I wound up using that bottle up and buying another bottle and putting all the old beans into it along with 10 more! Then, a few years ago, I bought a fifth of locally made craft vodka. I wasn't sure what I was going to do with it because neither of us drinks anymore, so it sat in the cabinet until I decided that I would turn it into vanilla extract. I stuck 10 vanilla beans in there and forgot about it for about 8 months. The result is a golden bottle of vanilla loveliness! So, I bought 20 more vanilla beans and some different types of booze and I'm making vanilla!


I believe in using alcohol that you would drink. I think it's the same concept as cooking with wine. If it's gross from the get-go, it's not going to be a top quality product at the end. The taste of that craft vodka puts it in the same league as Grey Goose, as far as I'm concerned. It's a shame that they went out of business.
I just started the rum and the Wild Turkey today as my 20 vanilla beans just came in. Rum extract is tasty. I like to use it in tropical flavored desserts like pineapple upside down cake or a from-scratch coconut cream pie. Vanilla rum extract is simply going to put rum extract into a league of its own. Same with all the others. Suffice it to say that I have a tidy little sum invested into my extracts and we'll enjoy them for many years to come.


The Exalt vodka used to be a clear liquor, just as the rum is right now. I've had the beans soaking in the vodka for over 8 months now. The Jack Daniels has been soaking even longer than that!


Can you tell which has been my favorite so far? 


In a few months, this rum will be the same color as the vodka is...and just as flavorful.

If you want to learn more about how vanilla is grown, here's an excellent video. Click here.

So, thank you for having this vanilla chat with me. I've really enjoyed it. I'll leave you all with some furry kid photos.


Peace!

Sunday, July 18, 2021

Thai-Inspired Red Coconut Curry Shrimp over Coconut Rice

 My husband gets started on some extensive dental work on Tuesday. He will be having all of his top teeth pulled. Granted, he's already lost most of them, but the rest will be going. When he had radiation treatment for throat cancer, over a decade ago, his teeth were trashed. He needs to get dentures. So, for several months, after getting his bottom teeth pulled out, which will be a few weeks after he gets the top ones done, he will not have any teeth at all to chew with. He needs to get dentures because he can't eat many foods. He has scar tissue in his throat and there is a dead muscle in there. It doesn't work. Anyhow, if food isn't chewed up really well, it hangs up on that spot and it chokes him and, sometimes, I've had to really whack him on the back to get it up. It's scary to go through and eating certain things for dinner gives me anxiety because I do not like to see that happen. Let's not even go there with Bob actually going through it. Yes, it's happened a few times at restaurants, too. He's learned to not order his favorite, which is steak. He knows that he can't eat anything like Chinese sweet and sour pork or chicken. He has trouble with spinach and greens. Tortillas and a gas station corn dog have made him choke. The poor guy!

Anyhow, that's the back story on how this recipe came about.
We both love Asian food. I think we could dine on Asian flavors for weeks on end and never tire of it. While Bob tends to favor Korean, I lean bit more toward Thai cuisine. We both like coconut curry, if it's not too spicy. So, I came up with a complete main dish that only uses 1 can of coconut milk, 1/2 a pound of shrimp, uses up a few summer squash, doesn't result in a gallon of leftovers and it's not spicy because, if it is, Bob can't eat it.
This is a huge win in my book. I do not have room in my fridge for leftovers and I'm not a huge fan of zucchini, or summer squash. I like winter squash just fine, but zucchini...yeah...not so much. I find summer squash to be just tolerable. Now, if you take that summer squash and put in a red coconut curry squash, that's going to pique my interest.


Here's how I did it. First, wash and chop all your ingredients. Make sure everything is prepped. Once you start, you do not have time to put everything on hold to chop up the next thing. Chop the veggies. Peel the shrimp. Thank me later. You're welcome. 


Veggies prepped beforehand.


Start the rice after you prep the veggies and shrimp. You'll have 20 minutes to cook the curry. If you don't have a rice cooker (I am not endorsing this brand. It's just a cheapie that I picked up on Amazon for under $20 and it does the trick because the burners, on my RV stove, burn too hot to cook rice on them), just use a saucepan with a tight-fitting lid. Either way, rice cooker or pan, it's going to take 20 minutes.

Saute the veggies in a hot skillet in a tablespoon of avocado oil until zucchini start to get a bit of color and the onion is softer, but not mush. 

Now's the time that you'll want to have already prepped those shrimp. I do pull the shells completely off. I don't leave the tail sections on. I actually don't really like it when the tail section of the shell is left on. It's annoying to me. 
You've already used 1/2 of a can of coconut milk in the rice, so this is when you use the other half of the can. First, you add red curry paste, fish sauce and some brown sugar. This would also be where you could add in a spice element, if you want, like however many Thai birds-eye chili peppers it takes for you to light yourself on fire, if you're into that! I skip them because of Bob. If it was just for me, I'd add 2 or 3 in. You could also just use crushed red pepper flakes or you could use a jalapeno pepper. There's many options out there. Pick the one that's right for you.
Did that sound like a commercial or what?


Once all the curry paste, coconut milk, and what have you meld together into a  homogeneous pool of yum, toss in the shrimp and keep stirring them around until they curl up and turn pink. This is very important. Do not overcook the shrimp. Overcooked shrimp is absolutely nasty and not even worth eating. Once they turn opaque, take the pan off the heat.
By this time, your rice should be done.
Also, by this time, your entire RV will be filled with a very lovely coconut scent...with the faintest hint of fish sauce.
Make sure to run an exhaust fan.
Whatever you do, DO NOT sniff the contents of a bottle of fish sauce.
I promise that it tastes nothing like it smells.


This was delicious. There were no leftovers at all because (mic drop) I actually created a recipe for TWO PEOPLE!
Thai-Inspired Red Coconut Curry Shrimp over Coconut Basmati Rice (yes, I know that they usually eat Jasmine rice, but I have basmati...deal with it). Delicious!


Serves 2


Coconut Basmati Rice

7 ounces (half a can) of coconut milk
1/2 cup + 2 tablespoons water
1/2 teaspoon brown sugar
1/4 teaspoon sea salt
3/4 cup basmati rice

If you're cooking in a rice cooker, add all the ingredients and cook for 20 minutes. If you're cooking in a saucepan, bring all ingredients, except the rice, up to a boil. Add rice, stir. Lower heat to as low as your stove will go. Pop a tight-fitting lid onto the pan. Cook for 20 minutes. Turn off the heat. Let stand for 5-10 minutes before opening lid to fluff the rice.


Thai-Inspired Red Coconut Curry Shrimp

1/2 pound large shrimp, peeled and cleaned.
1 tablespoon avocado oil
1/2 can coconut milk
1/2 of a medium-sized Walla Walla sweet onion, chopped (use 1/4 of the onion if it's a big one, like I had)
1 small zucchini, chopped
1 small yellow summer squash, chopped
1-2 tablespoons red curry paste
1/2 tablespoon fish sauce
1 tablespoon brown sugar
and
Make a cornstarch slurry using 1 tablespoon cornstarch mixed with 1 tablespoon water. You may or may not need this.

Prep all vegetables and shrimp in advance.
Heat skillet or wok over high heat. Add onions and cook, stirring constantly, for about 2 minutes before adding in all the squash (zukes and yellow squash) all at once. Continue to cook and stir for about 4-5 more minutes or until squash starts to get a bit golden in color and onion is soft but not mushy.
Add in red curry paste, cook for about 30 seconds, add fish sauce, brown sugar and coconut milk. Stir to combine curry paste into coconut milk. Once it's thoroughly blended in, add shrimp and cook, stirring, for another 3-4 minutes. If your sauce is too loose, bind it by slowly drizzling in the cornstarch slurry until it's the right consistency. I like mine a bit on the thinner side so that it will permeate the rice. If you want a thicker sauce, use the entire amount and it should tighten up enough to sit on top of the rice. It's a matter of preference.


Wednesday, July 7, 2021

Harvest Refrigerator Pickles

Yesterday, I decided to do a bit of harvesting out of the garden. I wanted to make some room to grow some more beets for a fall crop. Now, I grow beets exclusively in a black tote. It's 2x4 feet, but it's deep. I do not put any sort of filler in the bottom. I use it for root vegetables. Upon looking at my beets, I saw that I had taken them about as far as I could and it was time to pull most of them. I grew three different types this year: Golden and Chioggia, both of which, I bought the seeds from Baker Creek. I also grew a new variety, which I obtained in a seed trade called Yellow Mangel. They are the longer yellow ones. I also thinned out some of the Longue Rouge Sang carrots (Baker Creek) and some of the bigger onions.

Golden beets from Baker Creek. These are always a favorite and a huge hit with us.


Chioggia beets from Baker Creek. This was a new variety for me this year as I tend to stick with the Golden variety exclusively. I am sure glad that I branched out! These have a really cool white bullseye pattern inside. They are pretty stunning to look at.

I opted to boil the beets to loosen the skins. The thing when cooking beets is that, yes, you want to rinse the majority of the dirt off of them, but you want to leave an inch or two of the greens and the long roots on them, otherwise they will bleed the color onto everything.

I managed to fit them all into one pot, thankfully!

I knew I wasn't going to have quite enough veggies to fill my half-gallon Mason pickle jar, so I peeled up 3 carrots that I had in the fridge.

The carrots and onions are packed raw into the jar. I do not cook them first. If I did that, the texture would be gross. I did not peel the Longue Rouge Sang carrots, either. I just scrubbed them well.

When the beets were fork tender, I drained them and then let them soak in cold water in the sink to cool enough to be able to comfortably handle them.

Then I started slicing the beets up and layering everything into the jar.

It's quite pretty to look at. Behind the jar are 2 dozen farm eggs that were a bonus for Bob helping out one of the old volunteers from Fences For Fido. That is a great organization that puts up fences for dogs for people who qualify.

You bring the brine up to a boil.

Those are pink peppercorns. Pink peppercorns are interesting. They are not a member of the pepper family. They are actually a member of the cashew family. They impart a delicate taste and it's hard to describe it. You'll have to try them...try them on a bit of vanilla ice cream. I'm not even kidding!

All set! I use a wooden chopstick and poke it down in several spots to make sure there are no air bubbles and to work the peppercorns and mustard seed down to the bottom.      
  •                                              
 
  •                             


Harvest Refrigerator Pickles


Enough veggies to fill a half-gallon container (I used beets, carrots and onions. If you use beets, make sure to peel them first before slicing)
1-1/2 cups apple cider vinegar
1-1/2 cups water
1/2 cup + 1 tablespoon sugar
2 teaspoons sea salt
2 teaspoons whole black peppercorns
2 bay leaves
2 teaspoons yellow mustard seeds
4-5 whole cloves
1-1/2 teaspoons pink peppercorns

Pack veggies into the jar.
Meanwhile, bring all the ingredients, except for the pink peppercorns, to a boil and stir until sugar and salt have dissolved.
Add pink peppercorns to the top of the jar on the veggies.
Pour hot brine over the veggies and use a wooden chopstick to make sure there are there are no air bubbles and to disperse the peppercorns and mustard seeds to the bottom of the jar.
Let cool.
Seal and refrigerate.
This will last up to 4 weeks in the fridge.

Enjoy!

Monday, June 14, 2021

Brizola Sto Fourno


 Every delicious dinner starts with an idea. It's been raining pretty much the entire weekend here. The upside is that I don't need to water my garden, the downside is that I had to put a towel over my head and shoulders to go out and pick our salad greens yesterday. It was a warm rain, so I'm okay with that. I love growing my own lettuces. You just cannot begin to find these types or varieties in a store and you'd be hard pressed (or, at least, I would be) to even find them at a farmers market. I have Red Romaine, Sword, Buttercrunch and Drunk Woman Frizzy Head. 

Last night's meal started out with some potatoes that I needed to use up.
I had Bob run into the little market up in Castle Rock on Friday as I needed some yogurt and milk. He came home with some really nice looking bone-in pork chops. In a couple of days, he'll be getting all of his top teeth pulled out (when he had radiation treatment for cancer, 11 years ago, it wiped out his teeth), so whatever Bob wants to eat, I'll fix it for him. I get to decide the style, however.
I found a recipe that I talked to my sister, Ginger, about and we both agreed that it sounded unusual to us...but it was just too unusual to not make it. I did cut the recipe in half. Click here to view the recipe.

As with any recipe that is really delicious, it starts out with some potatoes. 

Here is the "unusual" part. You soak parchment paper in water. Yep. You read that right. You soak 2 large pieces of parchment paper in water. Get it wet. Swish it around. Let it soak for a few minutes. 

After you get done playing around with the parchment paper in the water, wring it out. Next, drape it over your baking sheet and cut up your potatoes. You could use Yukon Gold or a nice red skinned variety. It doesn't really matter.


The potatoes get seasoned with some chopped garlic, extra virgin olive oil, salt and pepper. Then you drizzle over some lemon juice (this is a Greek dish, after all!) and...


some white wine. I used a nice 2016 sauvignon blanc from right here in Washington state. We do tend to have some pretty spectacular wines produced from this state. 


After you add the wine, you cover the potatoes with the second piece of soaked parchment paper and seal it up. Then it goes into a 350-degree oven for around 40 minutes. Check it after 30 minutes because it really depends on your oven.

While the potatoes are in their lemony wine sauna, put some grill marks on your pork chops via a grill pan. Do not cook through. Remove from the pan and set aside.


After 30-45 minutes, pull the potatoes out of the oven, open the parchment sauna and...


stick the chops in on top of the potatoes. Reseal it and stick it back in for another 15 minutes or so. 

It doesn't get much better for a Sunday family dinner.